Bake Bakery-Quality Strawberry Crisp Bars: Expert Tips for Irresistible Summer Treats
Ever noticed how some portable desserts vanish from the potluck table almost instantly, while others languish untouched? The secret to creating those coveted, first-to-disappear treats often lies in a blend of irresistible flavor, perfect texture, and effortless portability. And when it comes to embodying all three, few desserts compare to the sheer delight of a perfectly crafted
strawberry crisp bars recipe. Forget bland bar cookies; these golden, fruit-filled squares deliver genuine bakery-quality results, making every bite taste like summer comfort food at its finest, all while starting with surprisingly simple pantry ingredients.
This isn't just another dessert; it's a testament to how thoughtful preparation and quality ingredients can elevate a classic to an unforgettable experience. Whether you’re packing them for a picnic, sharing at a gathering, or simply indulging at home, mastering this strawberry crisp bars recipe will make you the star baker.
The Anatomy of a Perfect Strawberry Crisp Bar: Crafting Textural Harmony
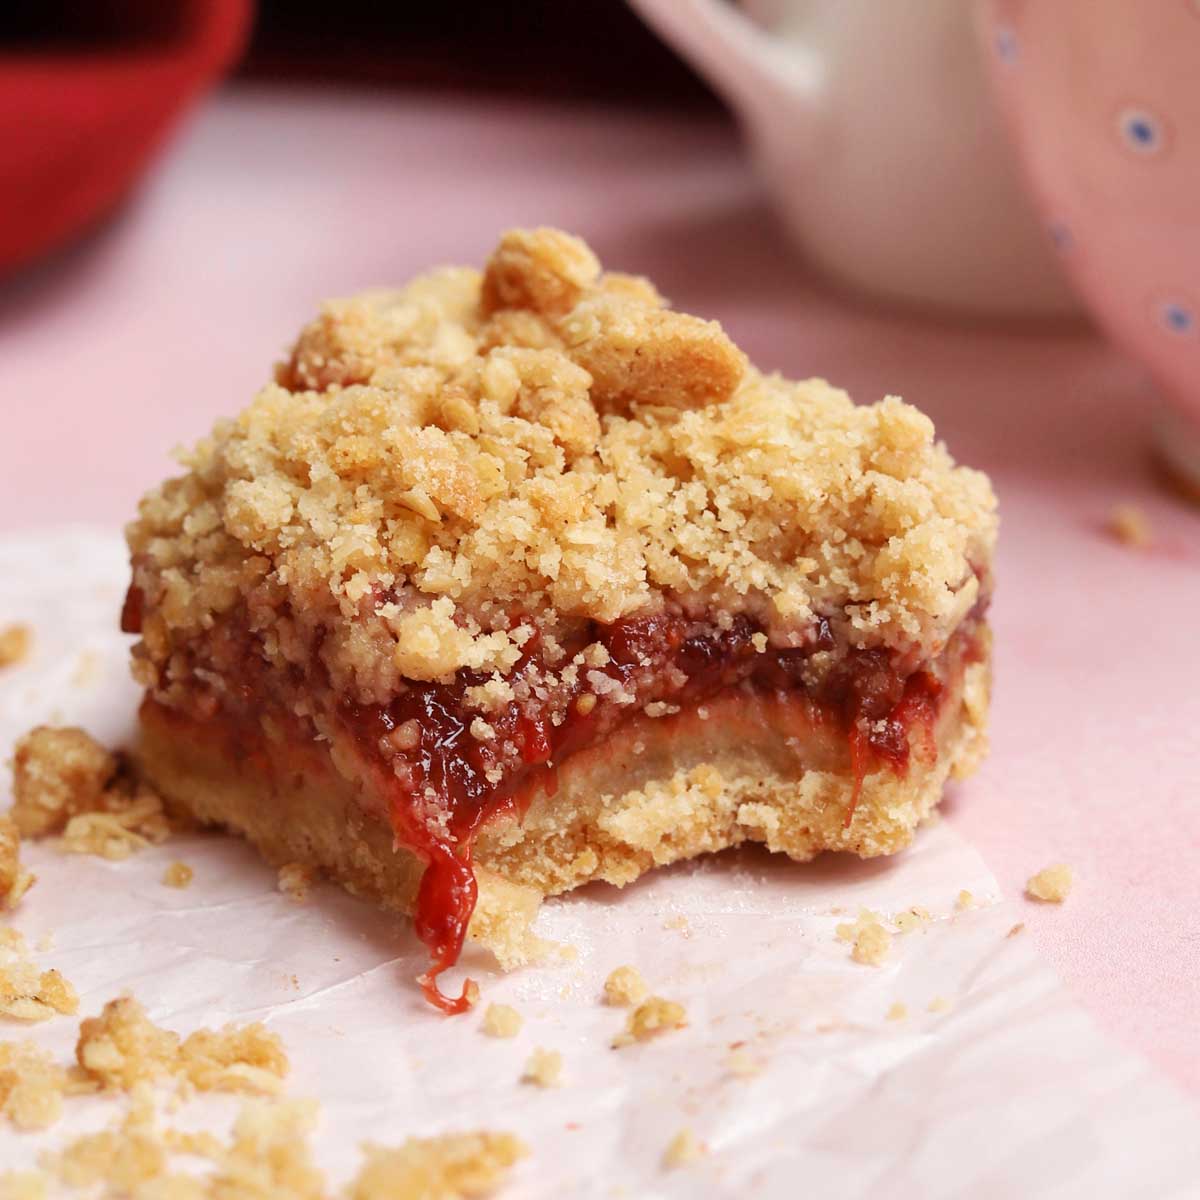
The magic behind truly incredible strawberry crisp bars lies in understanding the delicate balance of textures. Unlike a traditional crisp served in a bowl, a bar format demands structural integrity without sacrificing that beloved crumbly appeal. The foundational principle? The bottom crust needs to be robust enough to support the luscious fruit filling, while the topping remains wonderfully light and crumbly, providing a delightful textural contrast.
This ingenious design is primarily achieved through the oat mixture, which serves a brilliant double duty. Half of it forms a sturdy, buttery base, pressed firmly into the pan, providing the necessary foundation. The other half is generously sprinkled over the fruit, transforming into a golden, crispy, and beautifully textured topping during baking. This innovative approach is key to developing a
strawberry crisp bars recipe that holds its shape, travels well, and delivers on every promise of flavor and texture.
One common pitfall for many home bakers is getting the ratios wrong. Too much butter can lead to a greasy, soggy bottom that crumbles upon lifting, while too little results in a dry, unappealing disaster. The expert insight here is that proper ratios of butter to dry ingredients are paramount. It’s also about technique: the "press-and-sprinkle" method ensures you create a cohesive, stable base and a perfectly crumbly top, marrying structure with irresistible texture. This seemingly simple step is what truly sets bakery-quality bars apart from their homemade counterparts.
The Essential Ingredients: Why Quality and Choice Make All the Difference
While the
strawberry crisp bars recipe calls for relatively simple ingredients, selecting high-quality components significantly impacts the final taste and texture. Think of your ingredients as the building blocks; stronger blocks make a more impressive structure.
- Fresh Strawberries: Your Flavor Foundation
Good fresh strawberries are non-negotiable. Look for berries that are ripe, fragrant, and vibrant red, but still firm enough to dice without turning to mush during preparation or baking. Overripe berries can release too much moisture, leading to a soggy filling, while underripe ones lack the essential sweetness and tang. Expert Tip: Always grab a few extra! The prettiest, most uniform diced pieces go into your bars, and the rest make excellent prep-time snacks.
- Old-Fashioned Rolled Oats: The Texture MVP
This is where many home bakers unknowingly stumble. While instant oats might seem convenient, they are a definite no-go for this recipe. Instant oats are pre-cooked and finely cut, meaning they absorb liquid too quickly and turn mushy during baking, robbing your bars of that satisfying chewy-crisp texture. Old-fashioned rolled oats, on the other hand, hold their shape, provide crucial structure, and create that perfect, hearty texture that defines a classic crisp.
- Quality Butter: For Golden Richness
Don't skimp on the butter. A high-quality butter contributes immensely to the golden hue and rich, crispy texture of both the crust and the topping. Unsalted butter is generally preferred, as it gives you control over the overall saltiness of the dish. The fat content in good butter is what delivers that coveted melt-in-your-mouth richness and helps achieve the ideal crumb consistency.
- Brown Sugar: Moisture and Caramelized Notes
While granulated sugar sweetens the fruit, brown sugar plays a critical role in the oat crumble. Its molasses content adds essential moisture, helping the crumble stay tender yet firm, and imparts beautiful caramel notes that beautifully complement the strawberries. Practical Tip: Ensure your brown sugar is fresh and soft. If it's hard, microwave it briefly with a damp paper towel to soften before use.
- Cornstarch: The Secret to a Set Filling
Often overlooked, cornstarch is absolutely crucial for preventing a watery, runny fruit filling. It acts as a thickening agent, binding the natural juices released by the strawberries and creating that perfect, luscious, gel-like consistency that holds its shape when the bars are cut. Without it, your fruit layer would be a messy puddle. Ensure it's thoroughly mixed with the strawberries and granulated sugar for even distribution.
Mastering the Technique: Step-by-Step for Flawless Strawberry Crisp Bars
Achieving bakery-quality results isn't just about ingredients; it's about precision in execution. Here's how to master each stage of your
strawberry crisp bars recipe:
- Preparation is Key: Oven and Pan
Start by preheating your oven to 350°F (175°C). Then, prepare your 8x8-inch baking dish by lining it with parchment paper, ensuring you leave an overhang on two sides. This seemingly minor step is a major game-changer, allowing you to easily lift the entire cooled slab of bars out of the pan for clean, effortless cutting.
- Perfecting the Strawberries: Dice with Purpose
This is where many home bakers encounter issues. It's crucial to dice your strawberries small and uniformly, aiming for about ¼-inch pieces. Why? Evenly sized pieces distribute better, cook consistently, and prevent large pockets of fruit that could create soggy spots in your bars. If pieces are too large, they won't soften sufficiently or integrate well into the filling. Once diced, gently mix them with granulated sugar and cornstarch until every piece is well coated. The cornstarch needs to be thoroughly distributed to work its thickening magic.
- Crafting the Double-Duty Oat Crumble
In a separate bowl, combine your old-fashioned rolled oats, all-purpose flour, brown sugar, and a pinch of salt. Give them a good stir to combine the dry ingredients. Then, pour in your melted butter. Stir with a spoon or use your hands to incorporate the butter until the mixture forms moist, crumbly clumps that hold together when lightly squeezed. This texture is vital for both the base and the topping.
- The Press-and-Sprinkle Technique
Now, for the core of the crisp bars' structure. Take approximately half of your oat mixture and firmly press it into the bottom of your prepared baking pan. Use the bottom of a flat glass or a measuring cup to create an even, compact layer. This firm base is what gives your bars their stability. Next, evenly spread your prepared strawberry mixture over this pressed oat base. Finally, sprinkle the remaining oat crumble mixture evenly over the strawberries. This loose, scattered layer will transform into your golden, crisp topping.
- Baking and Cooling: Patience is a Virtue
Bake for 45-55 minutes, or until the topping is beautifully golden brown and the strawberry filling is bubbly and thick. The exact time can vary depending on your oven, so keep an eye on it. Once baked, the most crucial step for perfect bars is cooling. Let the bars cool completely in the pan on a wire rack—ideally for at least 2-3 hours, or even longer. Cutting hot or warm bars will result in a messy, crumbly outcome as the fruit filling won't have fully set.
Troubleshooting & Expert Insights for Your Strawberry Crisp Bars Recipe
Even with the best intentions, baking can present a few challenges. Here are solutions to common issues and further tips to elevate your
strawberry crisp bars recipe:
- Soggy Bottoms? This is usually due to too much moisture from the fruit, not enough cornstarch, or not pressing the base firmly enough. Ensure your strawberries are uniformly diced and well-coated with cornstarch. For a little extra insurance against sogginess, some bakers lightly pre-bake the bottom crust for 10-15 minutes before adding the filling.
- Dry or Too Crumbly Topping? This often means there wasn't enough melted butter in the oat mixture or the bars were overbaked. Always measure your butter accurately, and keep an eye on the oven to prevent over-browning and drying out the topping.
- Unevenly Baked Bars? Ovens can have hot spots. To combat this, rotate your baking dish halfway through the baking time. Also, as mentioned, uniform dicing of strawberries helps ensure even cooking of the fruit layer.
For more insights on perfecting this delightful treat, you might find our article on
Perfect Portable Strawberry Crisp Bars for Any Gathering particularly helpful. And if you're looking to make this your go-to summer staple, check out
Master Strawberry Crisp Bars: Your Essential Summer Recipe for additional tips and tricks.
Conclusion: Your New Go-To Summer Dessert
With these expert tips and a little practice, you're now equipped to bake strawberry crisp bars that aren't just good, but truly bakery-quality. From the golden, chewy oat base to the sweet, jammy strawberry filling and the crisp, buttery crumble topping, every element works in harmony to create a truly irresistible treat. This
strawberry crisp bars recipe is more than just a dessert; it's a portable slice of summer, perfect for sharing, celebrating, or simply savoring a moment of pure comfort. So go ahead, gather your ingredients, follow these steps, and prepare to impress everyone with your newfound baking prowess. Enjoy the sweet rewards!