Master Strawberry Crisp Bars: Your Essential Summer Recipe
As the days grow longer and the sun shines brighter, there's a certain magic that fresh, ripe strawberries bring to the table. While traditional crisps and pies are delightful, there's nothing quite like a portable treat that captures all that summery goodness in an easy-to-share format. Enter the strawberry crisp bars recipe – a dessert revelation that promises to be the first to disappear at every picnic, potluck, and backyard BBQ. These golden, fruit-filled squares aren't just delicious; they're a testament to simple ingredients transforming into bakery-quality results, delivering pure comfort in every bite.
Gone are the days of overlooked desserts. We've cracked the code to making Perfect Portable Strawberry Crisp Bars for Any Gathering that boast a perfect balance of sweet, tangy fruit and a buttery, crumbly oat topping. This isn't just another dessert recipe; it's your new secret weapon for mastering summer entertaining.
The Secret to Unforgettable Strawberry Crisp Bars
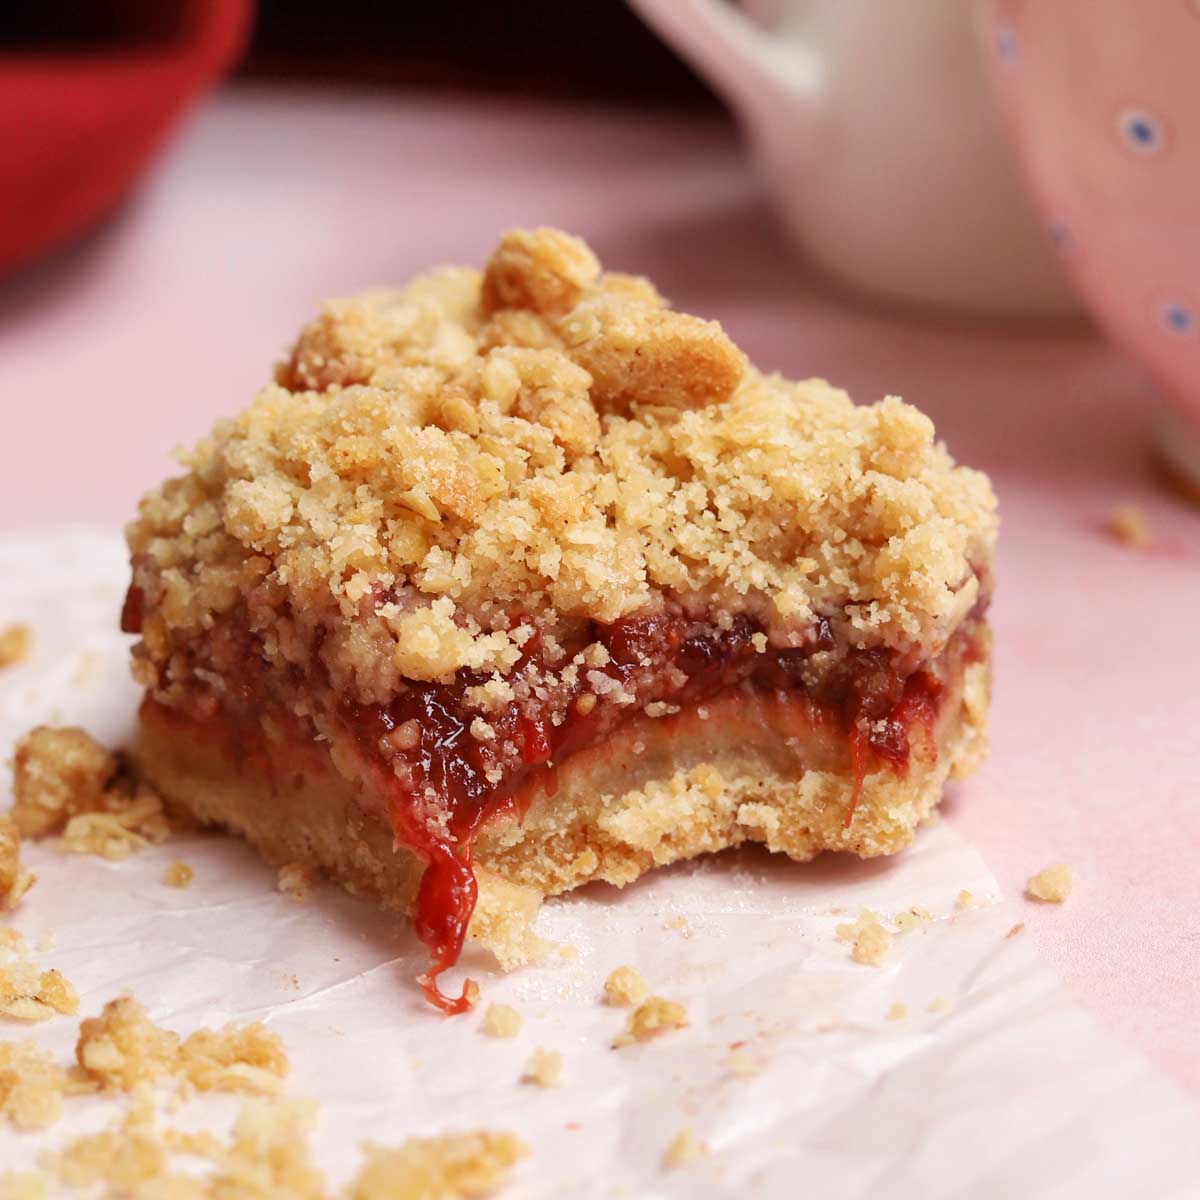
What makes a truly exceptional strawberry crisp bar stand out? It all comes down to balance and texture. The most common pitfall in baking bars is either a soggy bottom crust or a dry, uninspiring topping. Our strawberry crisp bars recipe ingeniously solves this by utilizing a versatile oat mixture that performs double duty. This single, glorious mixture forms both a sturdy, press-in base that can withstand the juicy strawberry filling and a delightfully crumbly, golden topping.
The key lies in the precise ratios of butter to dry ingredients. Too little butter, and your crust will be brittle and fall apart. Too much, and it becomes greasy. We've refined these proportions to ensure the bottom layer is firm enough to support the vibrant fruit center, while the top remains light, crisp, and full of textural contrast. It’s a simple press-and-sprinkle technique that, once mastered, guarantees success every time. The result is a travel-friendly bar that delivers all the comforting flavors of a classic strawberry crisp without the need for a fork and bowl.
Gathering Your Ingredients: Quality Matters
Just like any great recipe, the foundation of outstanding strawberry crisp bars begins with quality ingredients. Here's what you'll need, along with some insights to help you choose the best:
- Fresh Strawberries: These are the star of the show, so don't compromise! Look for berries that are bright red, fragrant, and firm but ripe. Avoid any with soft spots or mold. Ripe strawberries will give you the most intense flavor, but ensure they're firm enough to dice without turning to mush during prep. Consider grabbing a few extra for snacking while you bake – it's a chef's perk!
- Old-Fashioned Rolled Oats: This is a non-negotiable. While instant oats might seem convenient, they break down too quickly during baking, resulting in a mushy texture. Old-fashioned rolled oats, on the other hand, maintain their shape, providing that signature chewy, satisfying texture in both the crust and the crumble.
- Unsalted Butter: Quality butter truly makes a difference. It contributes to the rich, golden hue and irresistible buttery flavor of both the base and the topping. Using unsalted butter allows you to control the overall salt content of the recipe.
- Brown Sugar: Beyond sweetness, brown sugar adds a wonderful depth of flavor with its inherent caramel notes. Its moisture content also contributes to the tender chewiness of the oat mixture, complementing the strawberries beautifully.
- Granulated Sugar: Used primarily with the strawberries, granulated sugar helps to draw out their juices and sweeten the filling.
- All-Purpose Flour: Provides structure to the oat mixture, binding everything together.
- Cornstarch: A crucial ingredient for the strawberry filling! Cornstarch acts as a thickening agent, preventing the fruit from becoming a watery mess and ensuring a luscious, gel-like consistency that holds its shape when the bars are sliced. Without it, your bars would be swimming in liquid.
- Salt: A pinch of salt enhances all the other flavors, balancing the sweetness and bringing out the best in the butter and strawberries.
Crafting Your Strawberry Crisp Bars: A Step-by-Step Guide
Ready to create your summer masterpiece? Follow these steps to achieve bakery-quality results right in your own kitchen.
Prepping for Perfection
- Preheat and Prepare: Start by preheating your oven to 350°F (175°C). This ensures your oven is at the correct temperature from the moment your bars go in, promoting even baking. Line an 8x8-inch baking dish with parchment paper, making sure to leave an overhang on two sides. This seemingly small step is a game-changer for easy removal and clean, perfect slices once the bars are cooled.
- Dice Your Strawberries: Uniformity is key here. Dice your fresh strawberries into small, roughly ¼-inch pieces. This ensures they cook evenly, distribute well throughout the filling, and prevent any large, soggy pockets. In a medium bowl, gently toss the diced strawberries with the granulated sugar and cornstarch until they are thoroughly coated. The cornstarch will look like a light dusting, which is exactly what you want to create that beautiful, thick fruit filling.
Assembling the Oat Crumble
Now, let's create the versatile oat mixture that forms both the sturdy base and the irresistible topping. This is where the magic truly happens, laying the groundwork for a Bake Bakery-Quality Strawberry Crisp Bars: Expert Tips level of perfection.
- Combine Dry Ingredients: In a large mixing bowl, whisk together the old-fashioned rolled oats, all-purpose flour, brown sugar, and salt. Make sure there are no lumps of brown sugar.
- Add Melted Butter: Pour the melted unsalted butter into the dry oat mixture. Using a fork or your hands, mix until the ingredients are well combined and the mixture forms moist, crumbly clumps. When you squeeze a handful, it should hold together, but still be easily crumbled apart. This texture is vital for both the pressed crust and the loose topping.
- Form the Base: Take about two-thirds of the oat mixture and press it firmly and evenly into the bottom of your prepared baking dish. Use the bottom of a measuring cup or your fingers to create a compact, uniform crust. This firm base is critical for preventing your bars from falling apart once sliced.
Layering and Baking
- Add the Strawberry Filling: Carefully spoon the cornstarch-coated strawberry mixture over the pressed oat crust, spreading it evenly to the edges. Don't worry if it seems like a lot of fruit; it will cook down beautifully.
- Sprinkle the Topping: Crumble the remaining one-third of the oat mixture evenly over the strawberry layer. Aim for an even distribution to ensure every bite gets a taste of that delicious, buttery crumble.
- Bake to Golden Perfection: Place the baking dish in your preheated oven and bake for 40-45 minutes, or until the topping is golden brown and the strawberry filling is bubbly around the edges. You might even see some delicious crimson juice peeking through the crumble.
- Cool Completely: This step is arguably the most important for perfect bars! Once baked, remove the pan from the oven and let it cool completely on a wire rack for at least 2-3 hours, or even longer. Resist the urge to cut into them warm; the filling needs time to set, otherwise, your bars will be messy and fall apart. Patience truly is a virtue here.
Tips for the Best Strawberry Crisp Bars
- Don't Over-Mix: When combining the butter with the dry oat ingredients, mix just until combined. Over-mixing can develop the gluten in the flour, leading to tougher bars.
- Dice Uniformly: As mentioned, consistency in strawberry size helps with even cooking and prevents watery spots.
- Parchment Paper is Your Friend: Seriously, don't skip the parchment paper with an overhang. It makes lifting the cooled slab out of the pan effortless, allowing for clean, precise cuts.
- Proper Cooling is Crucial: Emphasizing this again because it's *that* important. Warm bars will crumble. Fully cooled bars will slice cleanly and hold their shape beautifully.
- Storage: Store leftover strawberry crisp bars in an airtight container at room temperature for up to 2-3 days, or in the refrigerator for up to 5 days. They can also be frozen for longer storage (up to 3 months).
Conclusion
These Master Strawberry Crisp Bars are more than just a dessert; they're an experience – a taste of summer, a symbol of effortless entertaining, and a testament to the simple joy of homemade treats. With a sturdy oat crust, a vibrant, juicy strawberry filling, and a delightfully crumbly topping, this strawberry crisp bars recipe will quickly become a cherished favorite. Whether you're bringing them to a gathering or simply enjoying them with a cup of coffee on a sunny afternoon, these bars promise to deliver pure, unadulterated bliss. So, embrace the season, grab your ripe strawberries, and get ready to bake your new essential summer dessert!
